The Art of the modern white and black photography is timeless, indeed. However, for many photographers digital colored photo remains an easier activity than photography with no color simply because in digital photography it’s harder to remove the color rather than to input it.
In previous mechanic photography era, a colored photo was considered to be a more complicated and thus prestigious activity because it demanded special chemicals and conditions for filming, etc. Nowadays black & white landscape photos are a more artistic activity rather than colored fashion photography, for example, etc. Here are some best black & white landscape photos tips from black white landscape photographers that can make your craft easier if you choose b&w photo art.

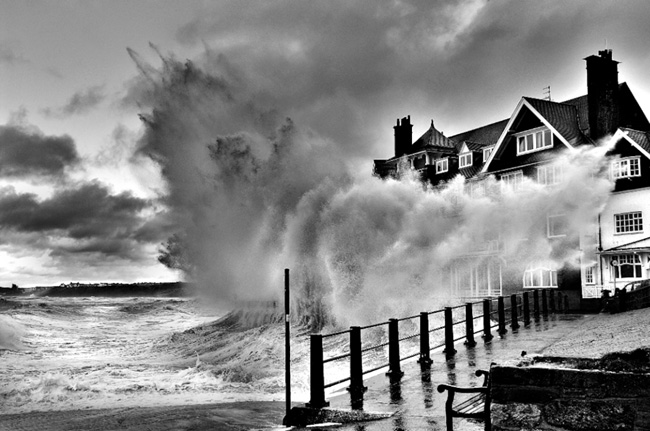
10 Landscape Photography Tips and Tricks
In this article, we’ve gathered 10 great tips for black and white photos for a quick start for those who want to see 50 shades of grey and discover the art of black and white photos.
Without resorting to mega color changes, you will be able to explore new forms, photographic lighting, as well as its texture, etc. The following quick tips will show you how to do that best of all.
1. Think in “mono”
Of course, the easiest way is to use Photoshop to make “mono ” photos and hope that it will look cool. But all the greatest photos from the great photographers were formed in their imagination and transferred to the paper without any software. Even if you are photographing in color, always try to imagine how objects will look like when they are monochrome. Very soon, you will see how to start getting good results.
2. Filter Effects
Traditionally, photographers use color filters to control “mono” in their images: red filter always increase the contrast, for example. You can set filters for the camera and try to achieve similar results, while your original images will remain colorful for as long as you do not turn them into black and white. If you want to combine all the good on both sides, take pictures without filters, but reproduce the effect in post-processing. Most photo editors offer a tutorial on how to do that for beginners.
3. Duotone Effect
Duotone effect can serve to improve your mono images. This effect can be achieved using such program as Photoshop CS Photoshop Elements or in some other cases. This processing technique is easy to master. It is important to think about how the color shades will affect the general mood of your picture. The blue shade evokes a feeling of coolness, which may not be suitable for some objects, but can be simply created for the others. Yellow or brown shades may give the feeling of something old and historic, etc.
4. Split-toning
This remarkable technique was popular among the traditional “black and white” photographers. They mixed the chemicals that literally smashed shades (split the tones in their prints) on their photographs. The end result of a subtle shift in tone light colors was visible, while the other shades painted the dark colors.
The results could be amazing. Like all the “old school” room photo developers, you can easily reproduce the effect of Split-toning in PhotoShop or other programs. At the same time your favorite room will remain clean.
5. Textures and shapes
The colorless, black and white photos look very arrogant with their shapes and textures. If you are thinking about your b&w photo business, train your brain and eyes to ignore the colors and, instead, focus your attention on the forms and textures.
6. Shoot in RAW format
Shoot in RAW and use the full power of programs such as Adobe Camera Raw, to convert your photo to black and white without much damage. You can also change the tone and contrast, and even add color shades. It is also possible to repeat the Split-tone effect and add a vintage effect for thrills.
7. Black and white portraits
Portrait picture can be a good idea. To improve it with the help of the right conversion in black and white mode can also be a way out. Where things and their color can distract attention away from the face of your character, black-and-white photograph will focus on facial features. It is also a good way to smooth out the skin tone, etc.
8. High / Low Exposure
Through a combination of brightening or dimming technology, you can create mono pictures, which will be either or very light or very dark tone. Photos obtained in this way, will be beautiful and emotional.
But it’s not just a case of underexposure or overexposure of your photos, or simple installation sliders levels (Levels) in PhotoShop to extremes. Use lighting and exposure, to create images that are not devoid of detail highlights and shadows, your camera’s histogram will be very useful if you’re shooting with the help of this technique.
9. Mono HDR
Ansel Adams (1902-1984) was a master mono photograph, which has developed a system of zones so that he could get the details at the same time and in the light and dark parts of his remarkable scenes. Today, you can use a little bit of his help. Taking some pictures of scenes with different exposures, you can combine them using HDR (High Dynamic Range) program such as Photomatix. This is a good way to get an image with a full range of tones. But do not spoil it!

10. Practice!
The more your eyes see black and white images, the better your photos are. There is no substitute for this hard work. As in other crafts, practice makes perfect.
Keep your “mono” eyes open and shoot like crazy! Do not forget to leave your comments with more suggestions and black & white photo tips. Good luck!